
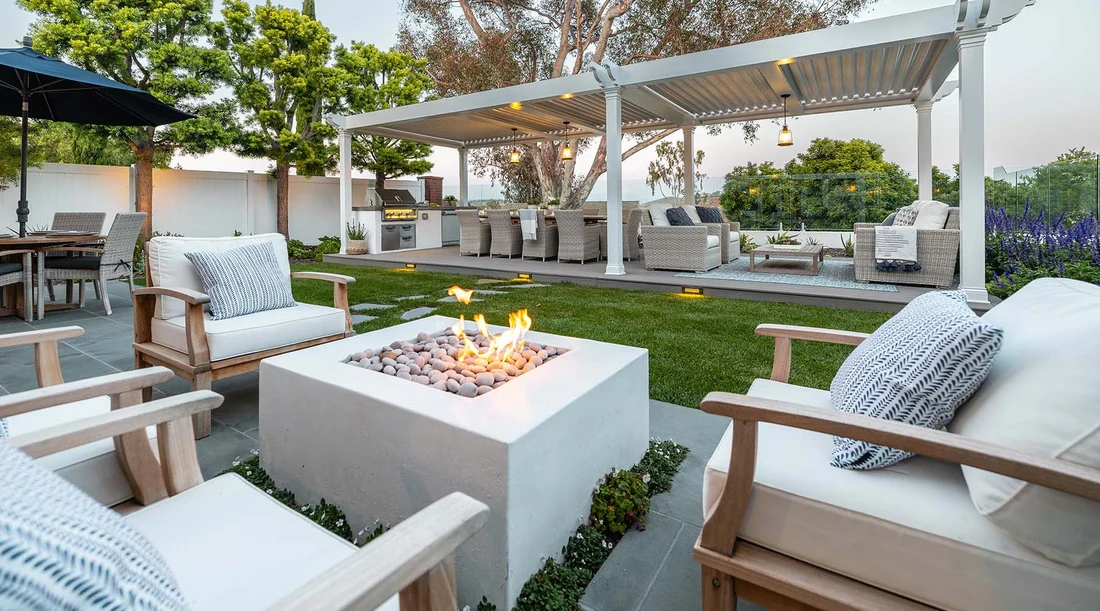

There is an undeniable magic that happens when the sun dips below the horizon and a patio comes alive with the warm, golden glow of string lights. They transform an ordinary backyard into an intimate retreat, perfect for late-night conversations or quiet evenings spent under the stars. Yet, the transition from a dreamy Pinterest board vision to your own backyard reality can sometimes hit a frustrating roadblock. We have all seen it: strings of lights that start out looking crisp and intentional, only to stretch, droop, and sag over time until they resemble a messy, tangled spider web swaying low in the wind.
Achieving that clean, professional overhead canopy without the dreaded middle droop is not a matter of luck. It is entirely about physics, structural planning, and using the right hardware. Hanging string lights by their own electrical cords from one flimsy hook to another is a recipe for disaster. The combination of gravity, thermal expansion, and wind resistance will stretch the copper wires inside, leading to premature burnout or a broken line. Building a sturdy support system ensures your investment lasts for years while maintaining a sharp, architectural look. Here is everything you need to know to hang your patio string lights like a seasoned professional.
Planning Your Layout and Measurements
Before you drill a single hole or climb up a ladder, you need a precise blueprint of your installation space. Winging it rarely yields good results and often leaves you short on cord length or with awkward anchor points. Start by walking your patio with a notepad and measuring tape, mapping out where your anchor points will be. Common anchor locations include the exterior fascia of your house, sturdy tree trunks, support posts of a pergola, or freestanding metal poles specifically installed for this purpose.
Think carefully about the pattern you want to create. A simple straight perimeter line offers a clean, modern frame for your outdoor space. A zigzag or crisscross pattern creates a dense canopy of light, which works wonderfully for larger, open patios that lack overhead structural coverage. Once you have chosen your pattern, measure the total linear distance and add about ten to fifteen percent to account for the catenary curve, slack at the ends, and connections to power outlets. Never stretch your lines taut to the absolute maximum limit; minor slack is necessary to accommodate temperature fluctuations, as outdoor cords expand in the summer heat and contract when winter temperatures drop.
Choosing the Right Hardware and Materials
The absolute secret to eliminating sag is separating the electrical load from the structural load. Instead of letting the light strings bear their own weight, you should install a separate support system made of galvanized steel guide wire, often referred to as catenary wire. This invisible backbone carries all the tension, while your lights simply rest alongside it.
To build this system, gather heavy-duty exterior hardware. You will need a spool of coated steel wire rope, a set of turnbuckles to tension the line, screw eyes or heavy-duty eye hooks rated for exterior use, and wire rope clamps or thimbles to secure the loops. For attaching the light strings to the guide wire, pick up a pack of UV-resistant black zip ties or specialized stainless steel clip hangers. Avoid cheap plastic zip ties that degrade quickly under direct sunlight, as they will brittle-snap within a single season and drop your lights into the middle of your patio furniture.
Selecting the Correct Bulbs and Fixtures
Not all string lights are created equal, and the type of fixtures you purchase plays a massive role in how well your installation will hold up. Residential-grade string lights found at big-box retailers are often lightweight and flimsy, designed for temporary holiday use rather than permanent outdoor living. For a permanent patio setup, invest in commercial-grade string lights. These feature thicker rubberized cords, molded socket seals that prevent water infiltration, and heavy-duty sockets that withstand harsh weather.
Pay close attention to bulb weight as well. Heavy glass Edison bulbs look stunning, but they add substantial weight to your spans, requiring a much stronger guide wire system and closer anchor points. If you live in an area prone to high winds, shatterproof polycarbonate LED bulbs are a far safer and more practical choice. They mimic the vintage aesthetic of glass while cutting down the total hanging weight by more than half, significantly reducing the strain on your anchors.
Step-by-Step Installation Using Guide Wire
With your layout planned and your materials gathered, you are ready to begin the physical installation. Taking your time through these steps will ensure a rock-solid setup that stays taut through heavy storms.
Step One: Installing Anchor Points
Your entire system is only as strong as its anchor points, so this step requires meticulous attention. If you are anchoring into wood, such as a fascia board or a pergola post, pre-drill pilot holes to prevent the wood from splitting, then drive heavy-duty screw eyes or eye hooks deep into the structural framing. Make sure you anchor directly into solid framing lumber rather than thin decorative trim, which can easily pull out under tension.
If you are anchoring into brick, stucco, or concrete, use a masonry drill bit to create holes, insert appropriate masonry anchors or expansion shields, and then thread your eye hooks securely into place. For yards lacking natural anchor points on opposite sides, you can install heavy-duty metal deck poles specifically engineered to bolt onto concrete slabs or anchor deep into soil using concrete footings.
Step Two: Rigging the Catenary Wire and Turnbuckle
Thread your coated steel wire rope through one eye hook, loop it back, and secure it tightly using a wire rope clamp. Stretch the wire across your patio to the opposite anchor point, pull it reasonably taut by hand, and cut it to length, leaving enough slack to form a loop. Insert a turnbuckle into this end before securing the wire with another clamp. Connect the turnbuckle to the opposite eye hook.
Now comes the magic of tensioning. Twist the barrel of the turnbuckle to draw the hooks inward, which pulls the steel wire rope tight. Use a level or simply eyeball the line to ensure it is straight and taut. The steel guide wire should carry all the tension of the span, leaving zero pulling force on the actual electrical cords.
Step Three: Attaching the Light Strings Securely
With your steel backbone firmly in place and tensioned to perfection, you can finally bring out the light strings. Plug your string into the nearest GFCI-protected outdoor outlet to test the bulbs before hanging them, ensuring you do not encounter any frustrating electrical issues halfway through the process.
Starting from the power source end, drape the string along your steel guide wire. Secure the cord to the wire using your UV-resistant zip ties or stainless steel clips spaced roughly every two to three feet. Do not pull the electrical cord drum-tight against the guide wire; leave a microscopic amount of slack so that temperature changes do not cause the cord to pull against the zip ties and stress the sockets. Snip the tails off your zip ties cleanly so they remain virtually invisible from the ground below.
Alternative Hanging Techniques for Unique Spaces
Every backyard layout is different, and sometimes a standard perimeter guide wire setup is not feasible. If you are working underneath an existing wooden pergola, you can run parallel guide wires along the underside of the rafters, creating a neat grid pattern that keeps the lights evenly spaced and entirely sag-free.
When running lines between mature trees, remember that trees grow and sway dynamically with the wind. Instead of screwing eye hooks directly into the trunk which can damage the tree, wrap a protective nylon strap or heavy-duty cable around the trunk and attach your hardware to that loop. This protects the bark from girdling while providing a stable, flexible anchor point that accommodates natural tree movement.
Troubleshooting Common Issues
Even with a meticulously planned installation, minor issues can occasionally arise. If you notice your lines starting to sag slightly after a few months, check your turnbuckles. Seasonal temperature swings cause materials to expand and contract, which can slacken the steel rope. A quick twist of the turnbuckle barrel will re-tighten the line instantly.
If bulbs flicker during high winds, ensure your string is securely fastened to the guide wire rather than just dangling freely. Excessive movement causes internal socket connections to bounce, leading to premature bulb failure. Regular maintenance checks twice a year will keep your patio lighting system looking immaculate and functioning flawlessly.
Creating Lasting Backyard Magic
Hanging string lights without sagging is entirely achievable when you approach the project with the right methodology. By separating the electrical load from a heavy-duty steel guide wire, anchoring securely into structural framing, and using weather-resistant materials, you elevate your outdoor space from a temporary seasonal setup to a permanent architectural feature. The result is a crisp, clean canopy of light that invites you to spend more time outdoors, turning ordinary evenings into cherished memories under the glow of a professionally finished patio.
Meta Title:

Comments are closed.